EditorConfig, ESLint, Prettier 之间的关系
· 阅读需 1 分钟
Gemini Deep research: https://gemini.google.com/share/2881e5f26082
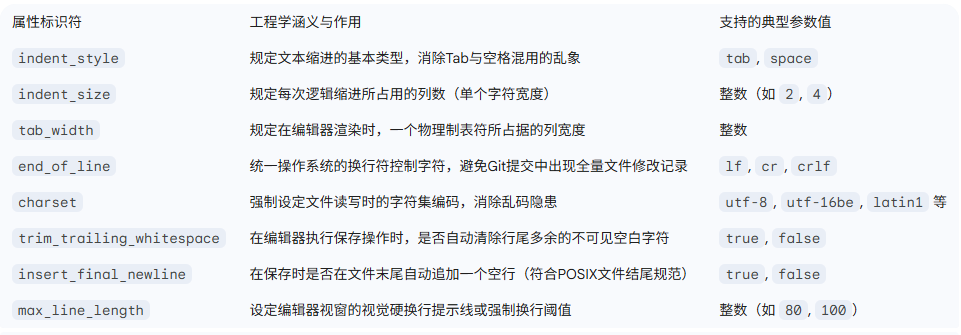
EditorConfig
EditorConfig 是为了解决不同的操作系统,编辑器之间差异的。如 换行符,tab 字符的长度。对任何文本格式的文件生效。如 .md,Makefile,.yaml,.sh
从 JSLint 到 ESLint
在不运行代码的前提下,解析代码(AST 静态分析), 发现语法逻辑问题(未定义变量,类型错误等)。
JSLint,不可配置 JSHint, 可配置,不支持第三方插件 ESLint, 一切皆可插拔
ESLint 要求每一个规则都是原子性的。
Prettier
Prettier 是为了解决代码格式化问题的。
- 最大行宽
- 括号对齐
- 标签闭合
- ...
eslint-config-prettier
解决 eslint 与 prettier 职责交叉的问题。
Oxlint
Rust 开发,性能更好。比 ESLint 快 50~100 倍。